Building a WiFi Pineapple for ~$60: The Shadowapple Build Log
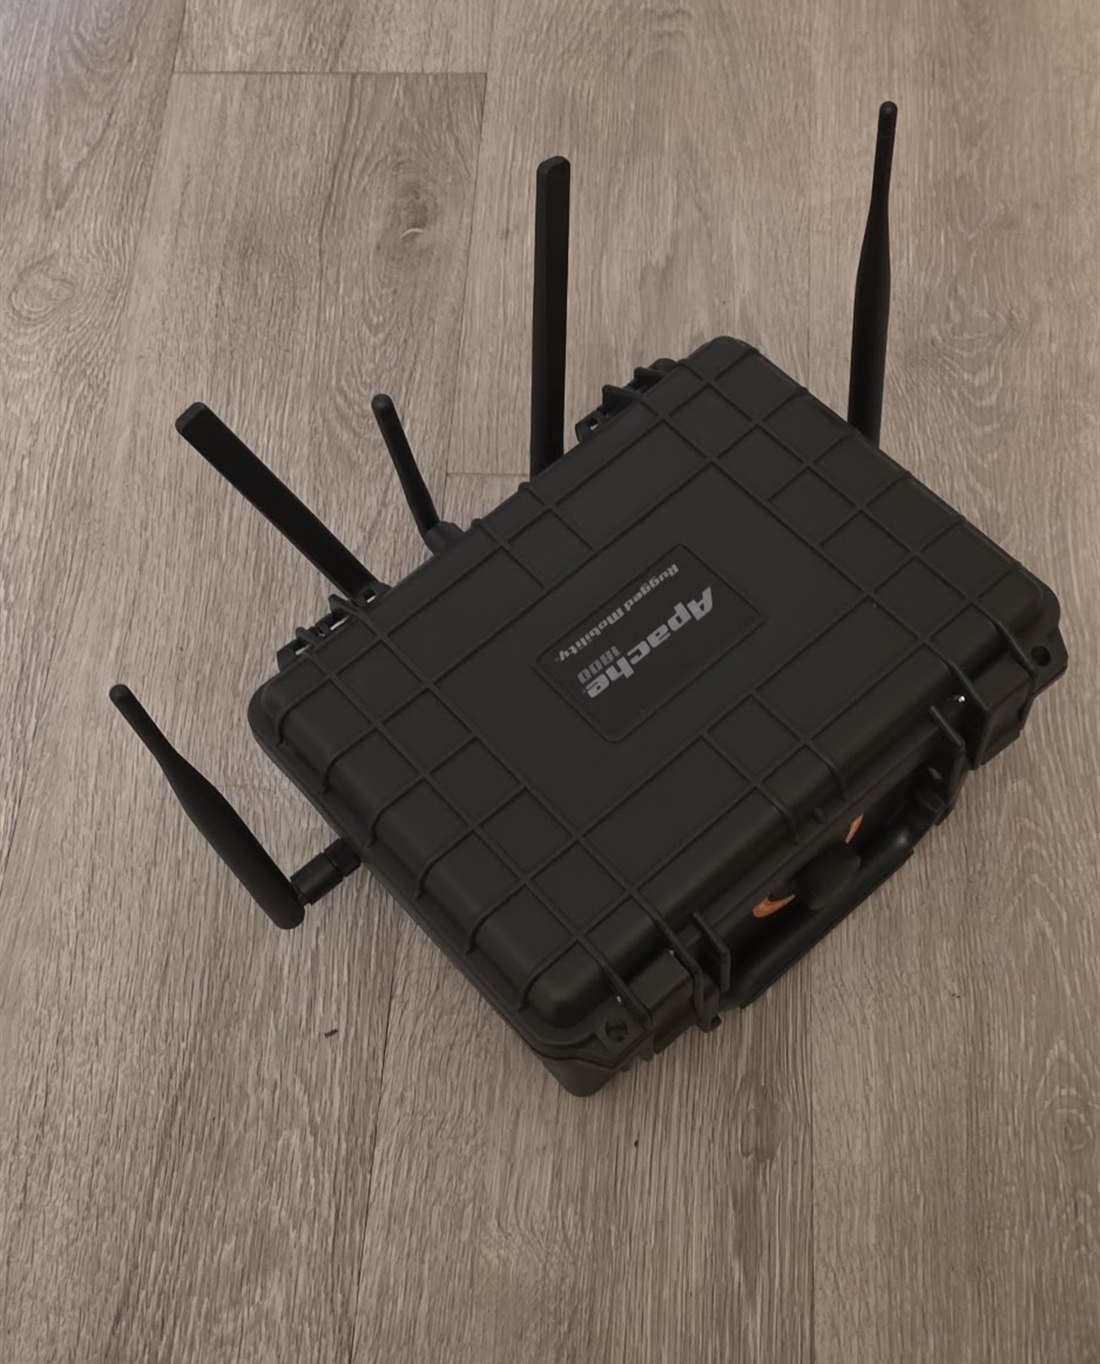 The finished build: the Shadowapple and its three radios packed into a rugged Apache 1800 case. Credit out to SHUR1K-N (McShuriken): Shadowapple)
The finished build: the Shadowapple and its three radios packed into a rugged Apache 1800 case. Credit out to SHUR1K-N (McShuriken): Shadowapple)
One bare travel router, a pile of contradictory tutorials, and every wall I face-planted into on the way.
A DIY take on the Hak5 WiFi Pineapple, built on a GL.iNet Shadow (GL-AR300M16-Ext) using xchwarze’s open-source Pineapple-cloner firmware and SHUR1K-N’s Shadowapple resources. This is written as a build log, not a glossy tutorial: I’ve left the wrong turns in on purpose, because the wrong turns are where I actually learned something.
Redaction / scope note. My Wi-Fi password and all real network identifiers (BSSIDs / client MACs) are redacted or replaced with placeholders throughout. Everything demonstrated here was done on my own hardware and my own network. See the Legal & Ethical section before you replicate any of it, that part is not optional.
1. Why build one instead of just buying it
A real Hak5 WiFi Pineapple runs a hundred bucks and up. I went back and forth on this for a while, the commercial unit is polished, supported, and turnkey, and my time isn’t free. But two things pushed me to build:
- Cost. The DIY route lands around $55 to $65 all-in, adapters and all.
- Understanding. A Pineapple isn’t magic hardware, it’s a dual-radio OpenWrt box running rogue-AP software behind a web UI. I wanted to actually understand each layer, and the surest way to understand a thing is to build it and have it fight you.
The enabler is xchwarze’s wifi-pineapple-cloner project, which ports the genuine PineAP firmware onto cheap OpenWrt routers, plus SHUR1K-N’s Shadowapple resources, which wrap all of it specifically around the board I ended up choosing.
2. Picking the router (rabbit hole #1)
Since the Pineapple is really just “a cheap OpenWrt board + PineAP,” picking the router is the build’s first big decision. I was torn between four:
- GL-AR750S ‘Slate’: dual-band, dual-radio, the ‘perfect’ pick on paper.
- GL-AR300M16 ‘Shadow’: Atheros, cheap, single-band internal radio.
- GL-MT300N-V2 ‘Mango’: cheapest, MediaTek, single-band.
- GL-MT3000 ‘Beryl AX’: modern Wi-Fi 6, dual-band, but ~$99 and not a cloner target.
WALL #1: The spec sheet lies, check the chipset. I nearly bought a GL-SFT1200 ‘Opal’: dual-band, three ports, cheap, looked ideal. It’s built on a Siflower SF19A28 with a closed Wi-Fi driver, no reliable monitor mode or injection, and no real mainline OpenWrt. The rule I wish I’d known on day one: for this project the chipset must be Atheros (ath9k) or MediaTek (mt76). Not Realtek, not Siflower. Marketing bullet points won’t tell you that; the chipset will.
WALL #2: The ‘perfect’ board is discontinued. The Slate was the answer… except it’s end-of-life. I burned real time chasing dead Amazon listings and one glorious eBay listing selling a used Slate bundled with six power cords for $80, more than a new one used to cost. Lesson: the ideal board may simply not be buyable anymore, and chasing it is wasted effort.
I landed on the Shadow (GL-AR300M16-Ext): Atheros QCA9531 / ath9k, ~$38, removable external antennas, and, crucially, the exact target of SHUR1K-N’s Shadowapple build. Its one catch: the internal radio is 2.4 GHz only. Hold that thought, because it drives the entire next section.
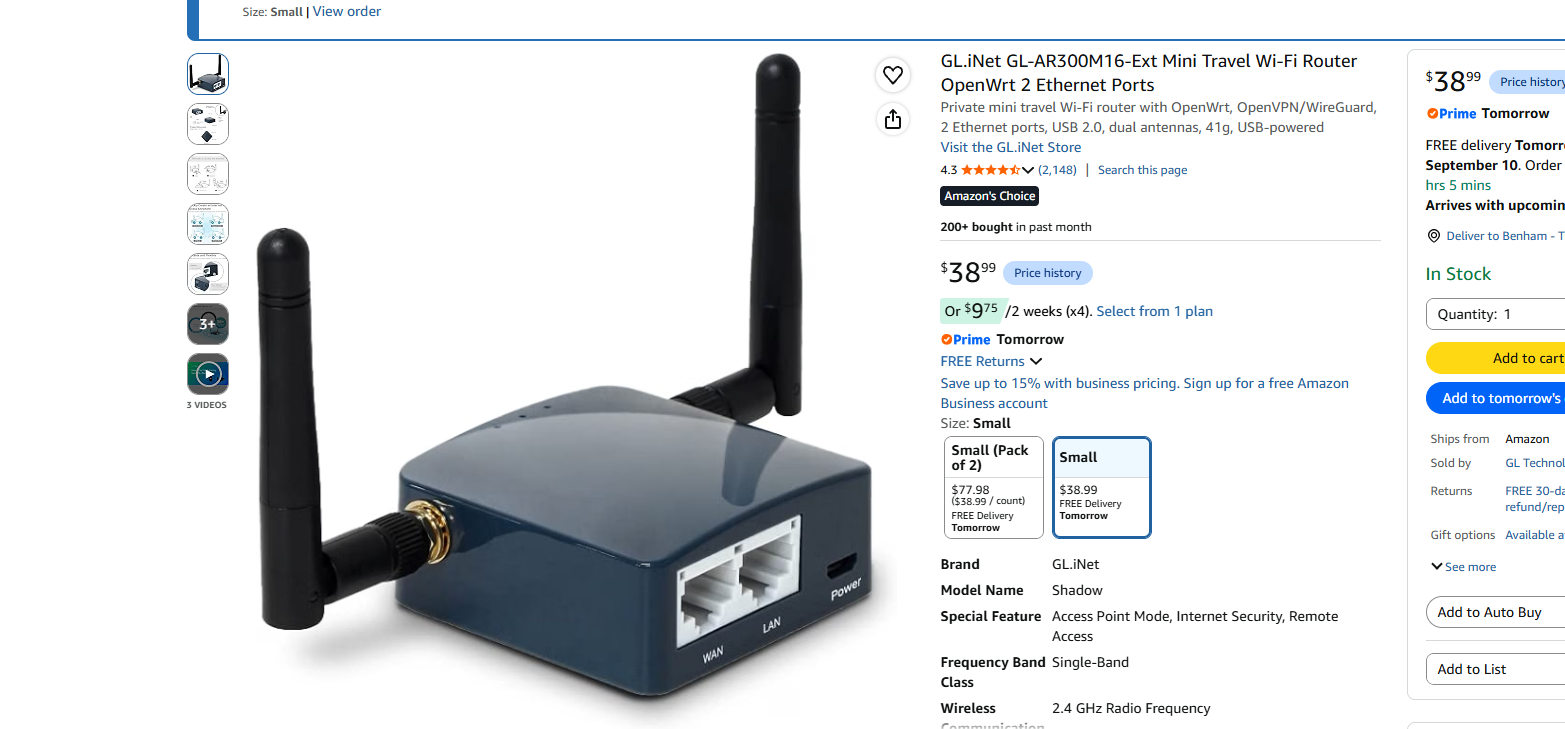 The Shadow (GL-AR300M16-Ext): Atheros QCA9531 / ath9k, external antennas, WAN + LAN ports, ~$39. The exact board SHUR1K-N’s Shadowapple build targets.
3. The adapter saga (rabbit hole #2, the long one)
The Shadow’s single internal radio does 2.4 GHz. To behave like a real Pineapple you want a second radio, and for 5 GHz you need a USB adapter. This is where I lost the most time.
WALL #3: The Realtek trap. For the cloner firmware, a 5 GHz adapter must be MT7612U or RT5572. That’s the whole list. The problem: ~90% of cheap ‘AC600 / dual-band / Kali’ dongles are Realtek RTL8811AU/8812AU, which do not work on this firmware, even though they work fine on a Kali laptop. I nearly bought three different Realtek cards that all ‘looked’ right.
The naming minefield
With Alfa alone, one letter changes everything:
| Model | Chipset | Works on cloner? |
|---|---|---|
| AWUS036ACM | MT7612U (MediaTek) | Yes (the fussy one) |
| AWUS036ACHM | MT7610U (MediaTek) | Marginal / not the target |
| AWUS036ACS | RTL8811AU (Realtek) | No |
| AWUS036ACH | RTL8812AU (Realtek) | No |
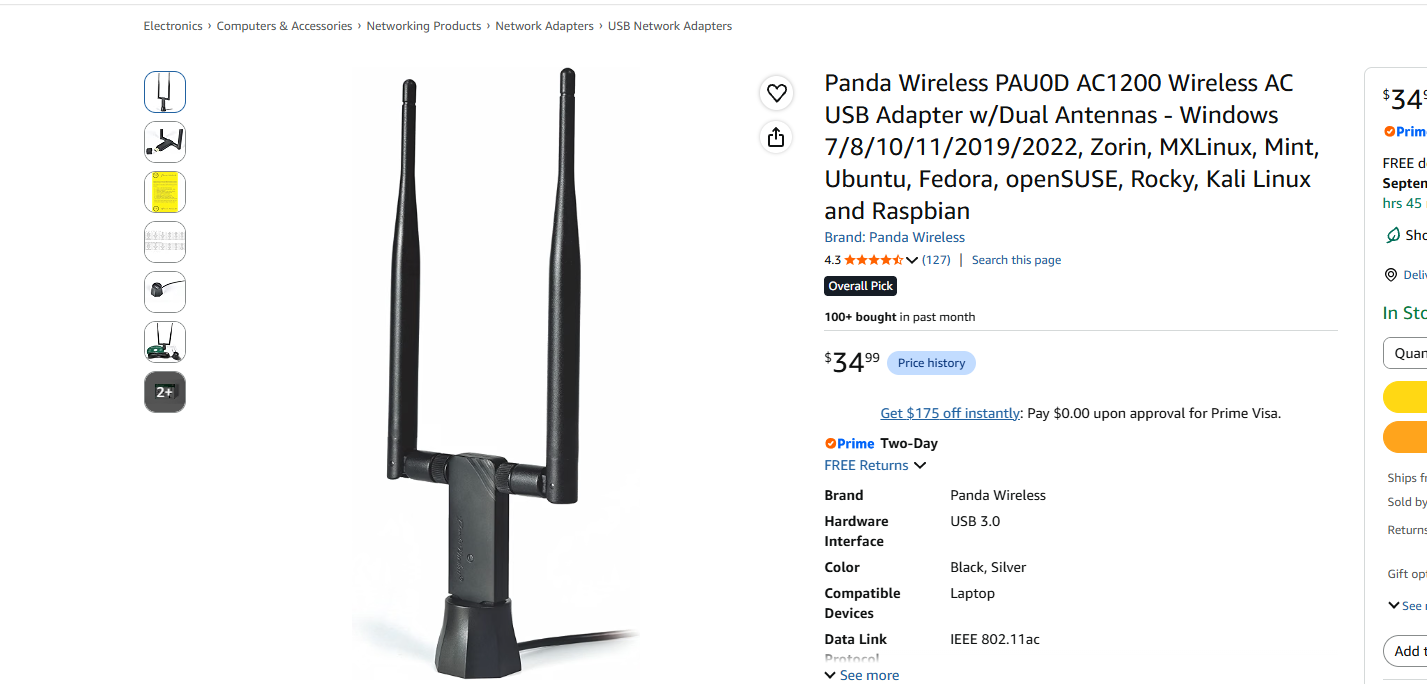 The Panda PAU0D (MT7612U), my 5 GHz adapter, and the fussy one. The whole-build headache was confirming it was MediaTek, not Realtek.
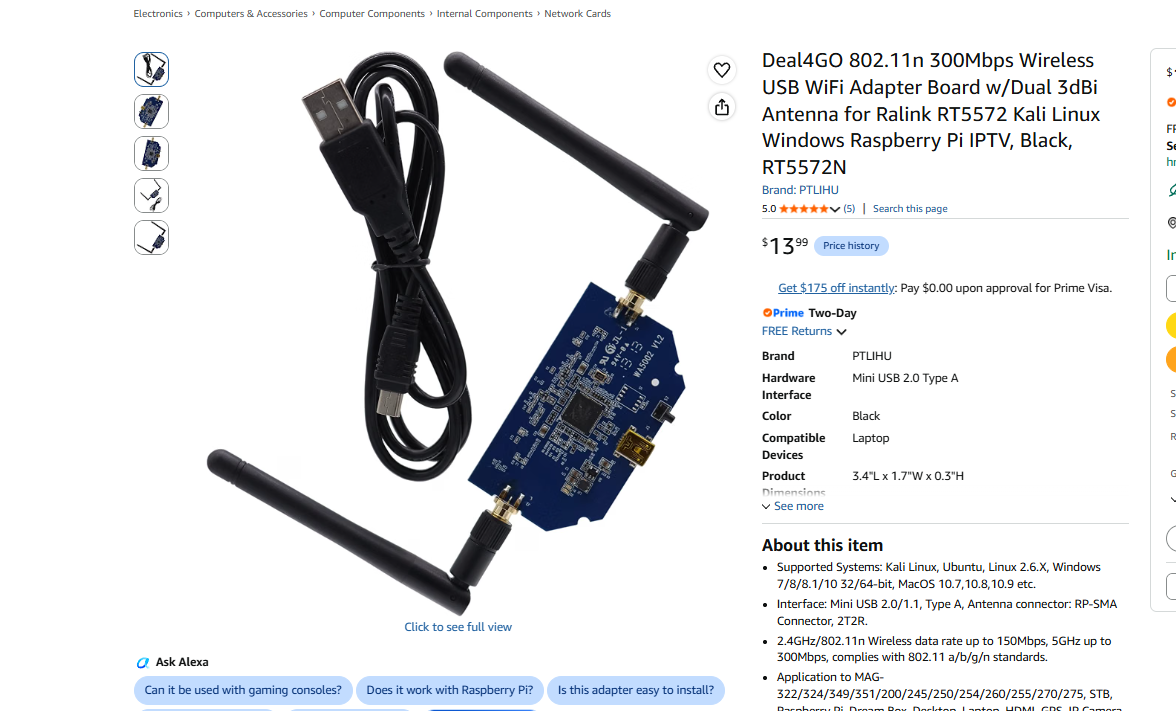 The RT5572 (here as a Deal4GO board, ~$14), the drama-free 5 GHz alternative to the toast-boat-prone MT7612U.
The “toast boat”
Some MT7612U adapters boot as a fake USB storage device instead of a Wi-Fi card. If lsusb shows 0e8d:2870, you’re in ‘the toast boat’ and need a USB mode-switch. If it shows 0e8d:7612, it woke up correctly. It’s a real chip quirk, SHUR1K-N literally advises “try to stay away from it,” and the drama-free 5 GHz alternative is the RT5572.
What I actually bought
| Part | Role | Paid |
|---|---|---|
| GL-AR300M16-Ext (Shadow) | The router / brains, internal 2.4 GHz radio | $42.01 |
| Panda PAU0D (MT7612U) | 5 GHz adapter | $37.70 |
| RT5370 USB adapter | Cheap, rock-solid 2.4 GHz second radio | $23.69 |
| 3-port USB hub | Shadow has ONE USB port; needs adapter(s) + storage | $5.80 |
| USB flash drive | Pineapple storage (no SD slot on this board) | on hand |
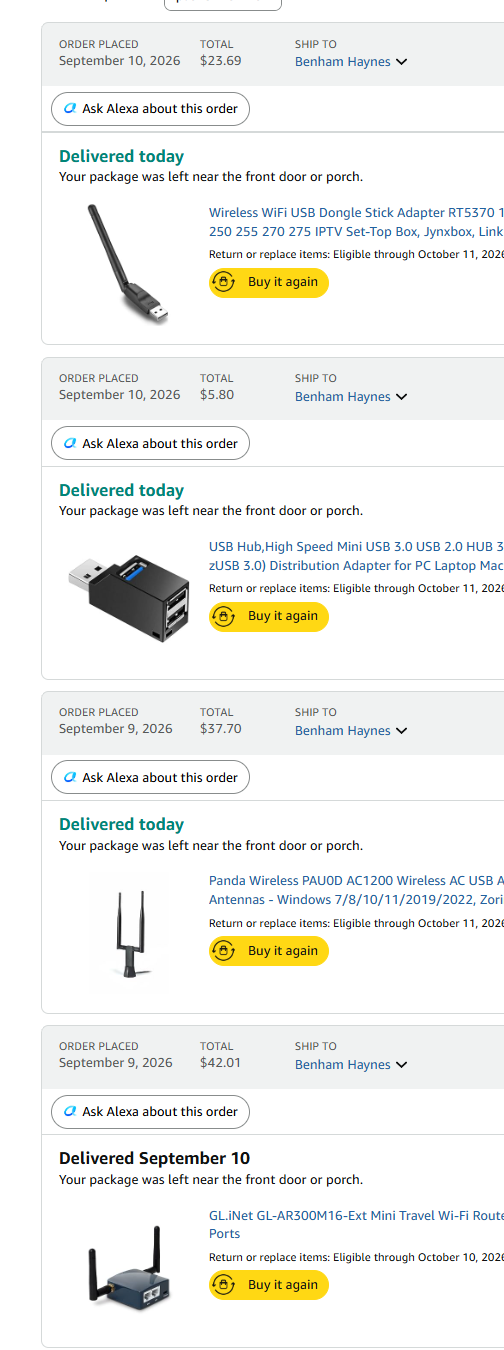 The actual receipts: Shadow ($42.01), Panda PAU0D ($37.70), RT5370 ($23.69), and the 3-port USB hub ($5.80).
What I actually spent: ~$109 for the full three-radio kit. But that’s the loaded build. The ~$60 minimum that gets you a genuinely working Pineapple is just the Shadow (~$42) + one cheap adapter (an RT5370 runs ~$14 to $24) + a USB stick you already own. That alone gives you the internal 2.4 GHz radio plus a second radio, enough for real recon and the full attack chain on 2.4 GHz. I paid up for the extras (the Panda for 5 GHz and a hub) to reach SHUR1K-N’s recommended three-radio setup. Start at $60; add the 5 GHz card and hub only when you actually want 5 GHz. Either way you’re under the cost of a Hak5 unit and you understand every part of it.
4. Flashing (this is the part people get wrong)
WALL #4: Two images, two different version rules. You need two firmware files, and their version rules are opposite, this cost me an hour of confusion:
- Stock OpenWrt for the AR300M16, the latest stable release (NOT the old v19). Older tutorials point you at 19.07, but the AR300M16 image doesn’t exist in that release, so you’ll hunt forever. Use the firmware selector, newest version.
- The cloner image,
gl-ar300m-universal-sysupgrade.bin, the 19.07.7 build, from xchwarze’s GitLab build repo (the GitHub one is empty; it moved).
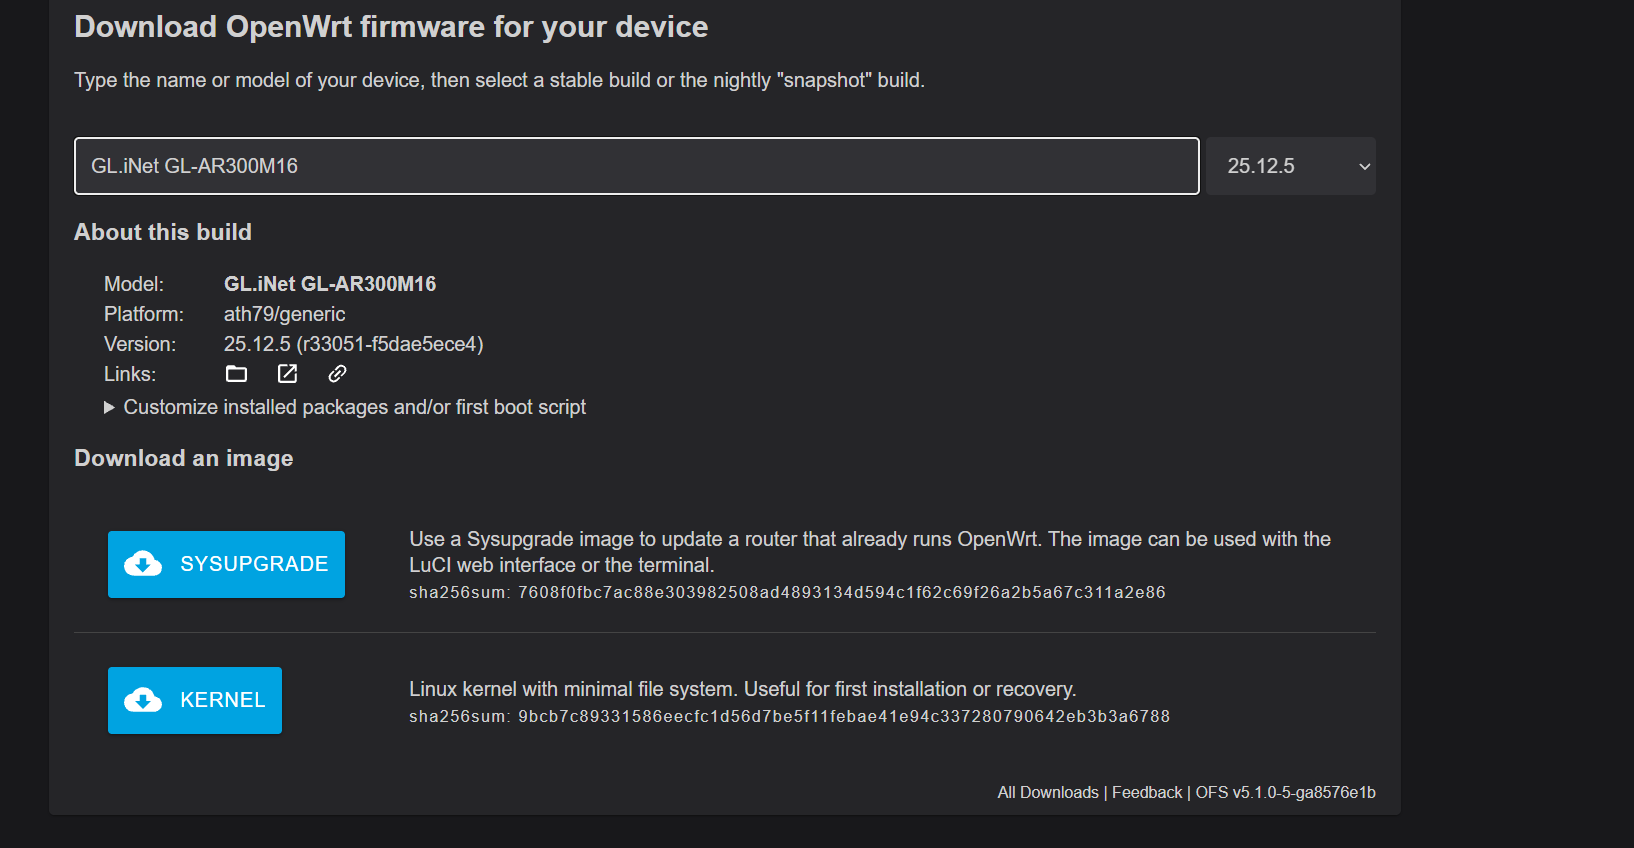 OpenWrt Firmware Selector, searched “GL-AR300M16”, latest stable build. Model = GL.iNet GL-AR300M16, Platform = ath79/generic. Grab both SYSUPGRADE and KERNEL to be safe.
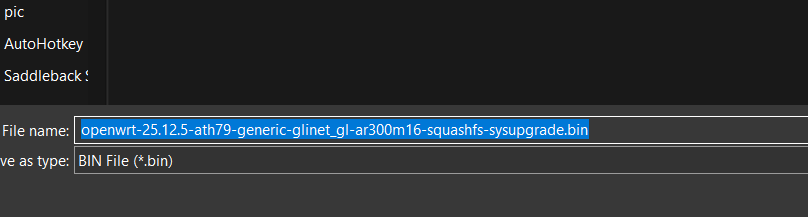 The file you want:
 openwrt-25.12.5-ath79-generic-glinet_gl-ar300m16-squashfs-sysupgrade.bin. Match the AR300M16 variant exactly.
Recovery-mode flash
Everything happens in GL.iNet’s U-Boot recovery, no SSH gymnastics required:
- Connect the Shadow to your PC by Ethernet.
- Hold reset while plugging in power; release when you see 2 solid green LEDs (~6 s).
- Set your PC’s IP to
192.168.1.2(subnet auto-fills), disable Wi-Fi. - Browse to
192.168.1.1, the recovery / firmware-update page.
Flash stock OpenWrt first → let it fully reboot → then flash the cloner image through LuCI (System → Backup / Flash Firmware) with ‘Keep settings’ unchecked and ‘Force upgrade’ checked. Three solid LEDs means done.
Brick safety. Match the AR300M16 variant exactly, not Lite, not NAND, not NOR, or you soft-brick it. The saving grace is that U-Boot web recovery is the recovery mechanism itself, so a bad flash is almost always recoverable by re-entering recovery. Hard to permanently kill.
5. First boot & setup
If it worked, browsing to 172.16.42.1:1471 greets you with the pulsating pineapple. “Get Started” walks you through Radio Config, Filters, then drops you at the dashboard.
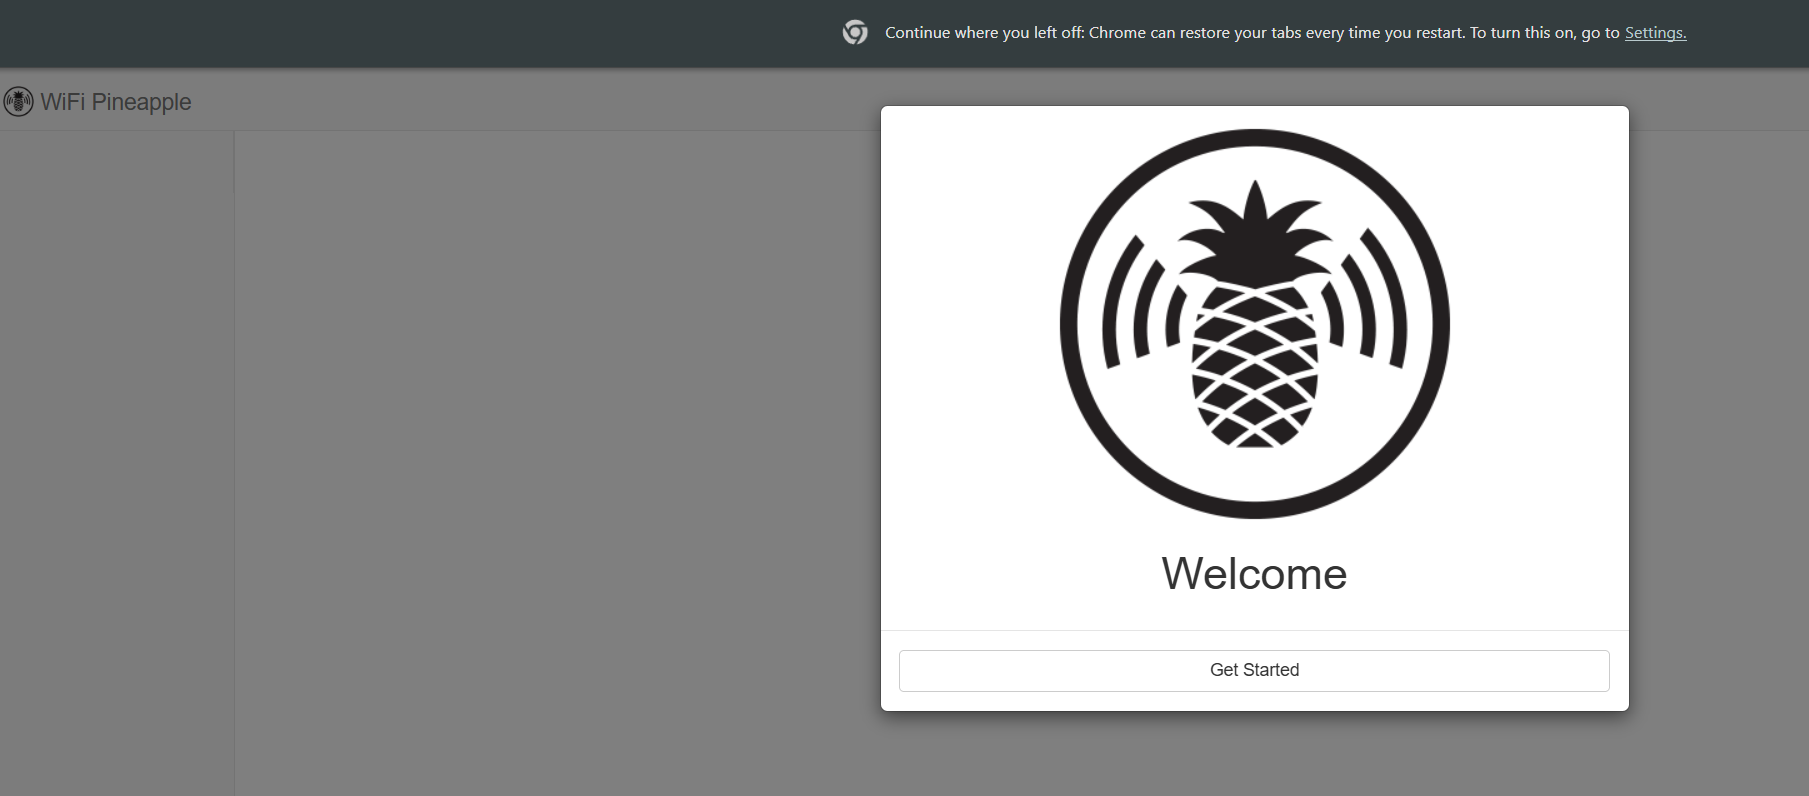 The WiFi Pineapple ‘Welcome’ screen. Proof both flashes took, the cheap travel router now boots as a Pineapple.
Radio configuration
- Management AP: your private control network. I set a strong WPA2 password (redacted here, obviously) and wrote it down, it’s what you log in with.
- Open AP: the bait SSID PineAP uses. Fine to leave default at first.
- Country code: set correctly for legal TX power / channels.
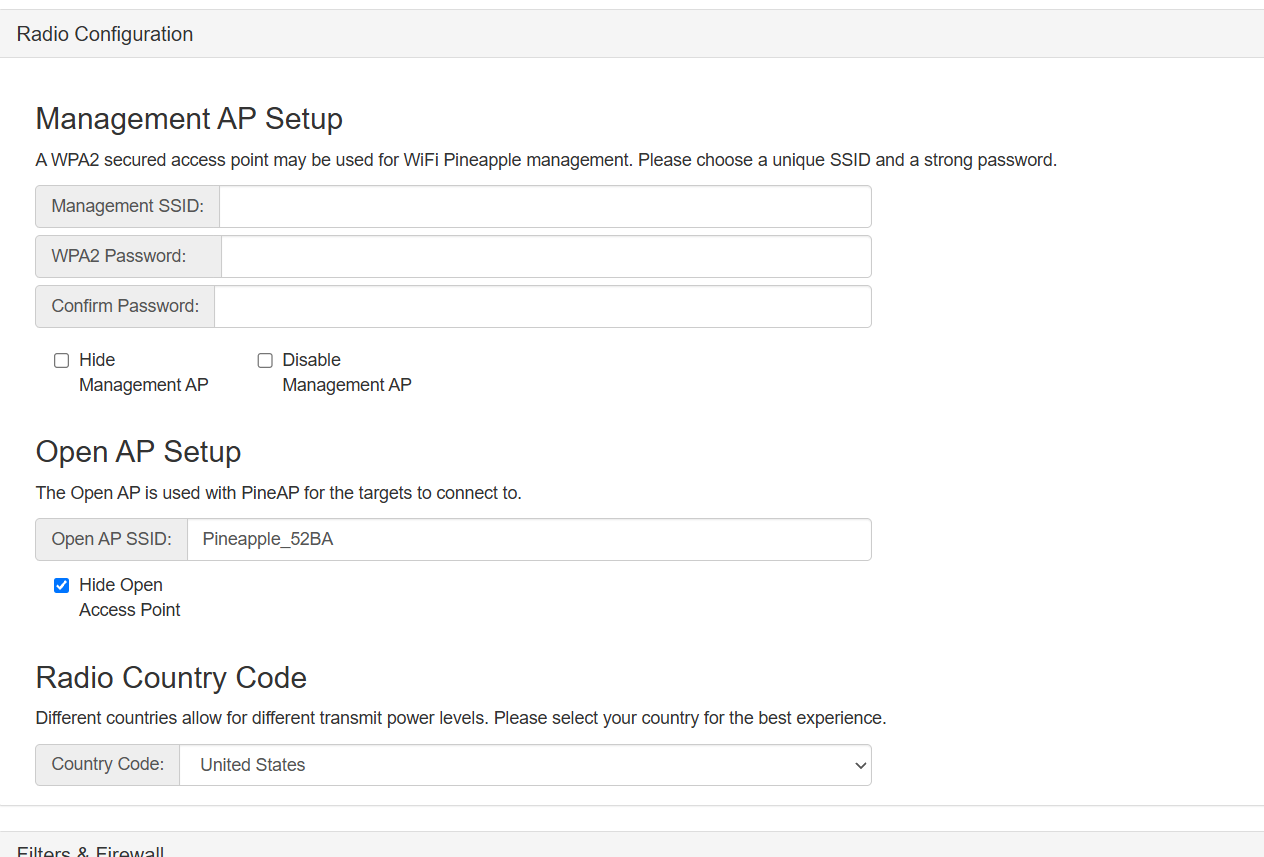 Radio Configuration: Management AP (password left blank here), Open AP (
Pineapple_52BA), and Country Code. The Management AP is your leash-holder network, not an attack AP.
For Filters, Deny-mode-with-an-empty-list gets you running. Just understand what that means: the Pineapple will respond to everything. That’s fine for setup on your own bench; it is not fine pointed at a neighborhood (see Legal & Ethical).
6. The storage wall
WALL #5: There is no SD slot. Every tutorial says “insert an SD card.” The AR300M16 has no SD slot, GL’s own spec sheet literally reads ‘TF Card Slot: N/A.’ Storage has to be a USB flash drive instead. And since the board has only one USB port, which you also need for the adapter, that’s exactly why the 3-port hub is on the parts list.
Plug the flash drive in, then format it through the panel (Advanced → USB & Storage → Format SD Card), not on your PC. It mounts at /sd.
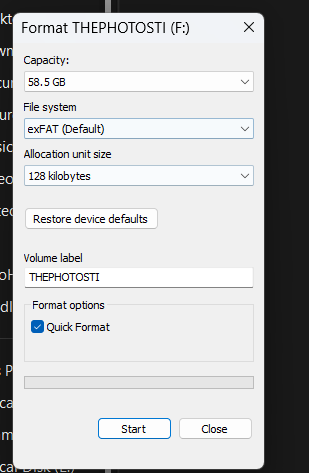 The USB stick that stands in for the missing SD card, 58.5 GB, exFAT. Format it from the Pineapple panel, not Windows.
7. Missing packages & feeding it internet
WALL #6: ‘Not enough space’ until storage is mounted.
wpc-tools missing_packagesfailed with a space error, the 16 MB internal flash is basically full. The stripped dependencies install to/sd, so the USB storage has to be mounted first. Once it was, the command ran clean.
I fed it internet the clean way: an Ethernet cable from my firewall into the Shadow’s WAN port, so it never has to burn the radio on client mode. It pulls a DHCP lease and reaches the internet to grab packages.
root@Pineapple:~# df -h /sd
Filesystem       Size  Used  Avail  Use%  Mounted on
/dev/sdcard/sd1  56.4G 52.0M 53.5G  0%    /sd

root@Pineapple:~# wpc-tools missing_packages   # now installs to /sd
8. Confirming the radios
Sanity-check what the box actually sees. lsusb for the adapters, iw dev for the radio interfaces:
root@Pineapple:~# lsusb
Bus 001 Device 007: ID 0e8d:7612 MediaTek Inc.      <- Panda, WiFi mode (not the toast boat)
Bus 001 Device 004: ID 148f:5370 Ralink RT5370      <- 2.4 GHz adapter
Bus 001 Device 003: ID ffff:5678                    <- USB storage
Bus 001 Device 002: ID 214b:7260                    <- the hub itself
The Panda came up as 0e8d:7612, Wi-Fi mode, not 0e8d:2870, so I dodged the toast boat entirely. End state: three radios, internal (2.4 GHz management), RT5370 (2.4 GHz), Panda (5 GHz).
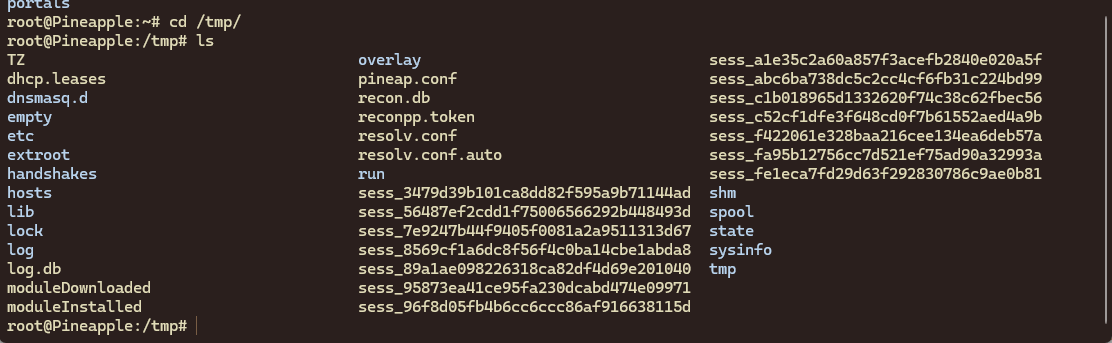 On the box over SSH:
 /tmp holds the live session files, recon.db, and the handshakes directory where captures land.
WALL #7: The band lesson. My 2.4-only adapter couldn’t see my own devices, because every one of them lives on 5 GHz. The adapter’s band determines what you can even see. Adding the 5 GHz Panda is what finally made my own network appear in scans. Obvious in hindsight; not obvious at 1 a.m.
Getting a stable monitor interface
Bringing up a working monitor interface was finicky: background processes kept channel-hopping the radio out from under whatever I was doing. Killing the interfering processes and locking the interface to a fixed channel fixed it. This is a general monitor-mode gotcha on single-radio gear, worth knowing regardless of what you’re pointing it at.
9. Making it do something
With the radios up, Recon finally works, select a band (or Both) and it maps every AP and client around you. The genuinely useful skill isn’t running the scan, it’s reading it:
- One physical router broadcasting several SSIDs shows up as several near-identical MACs (same last bytes, different first byte). You can spot a multi-SSID AP just by eye.
- Security shows per network, in my block, a sea of WPA2 with a single ancient WEP outlier and a couple of WPS-enabled boxes standing out immediately.
- Phones and laptops broadcast randomized MACs (a privacy feature); IoT gear, TVs, Echos, plugs, almost always broadcasts its real, static MAC, which makes it trackable.
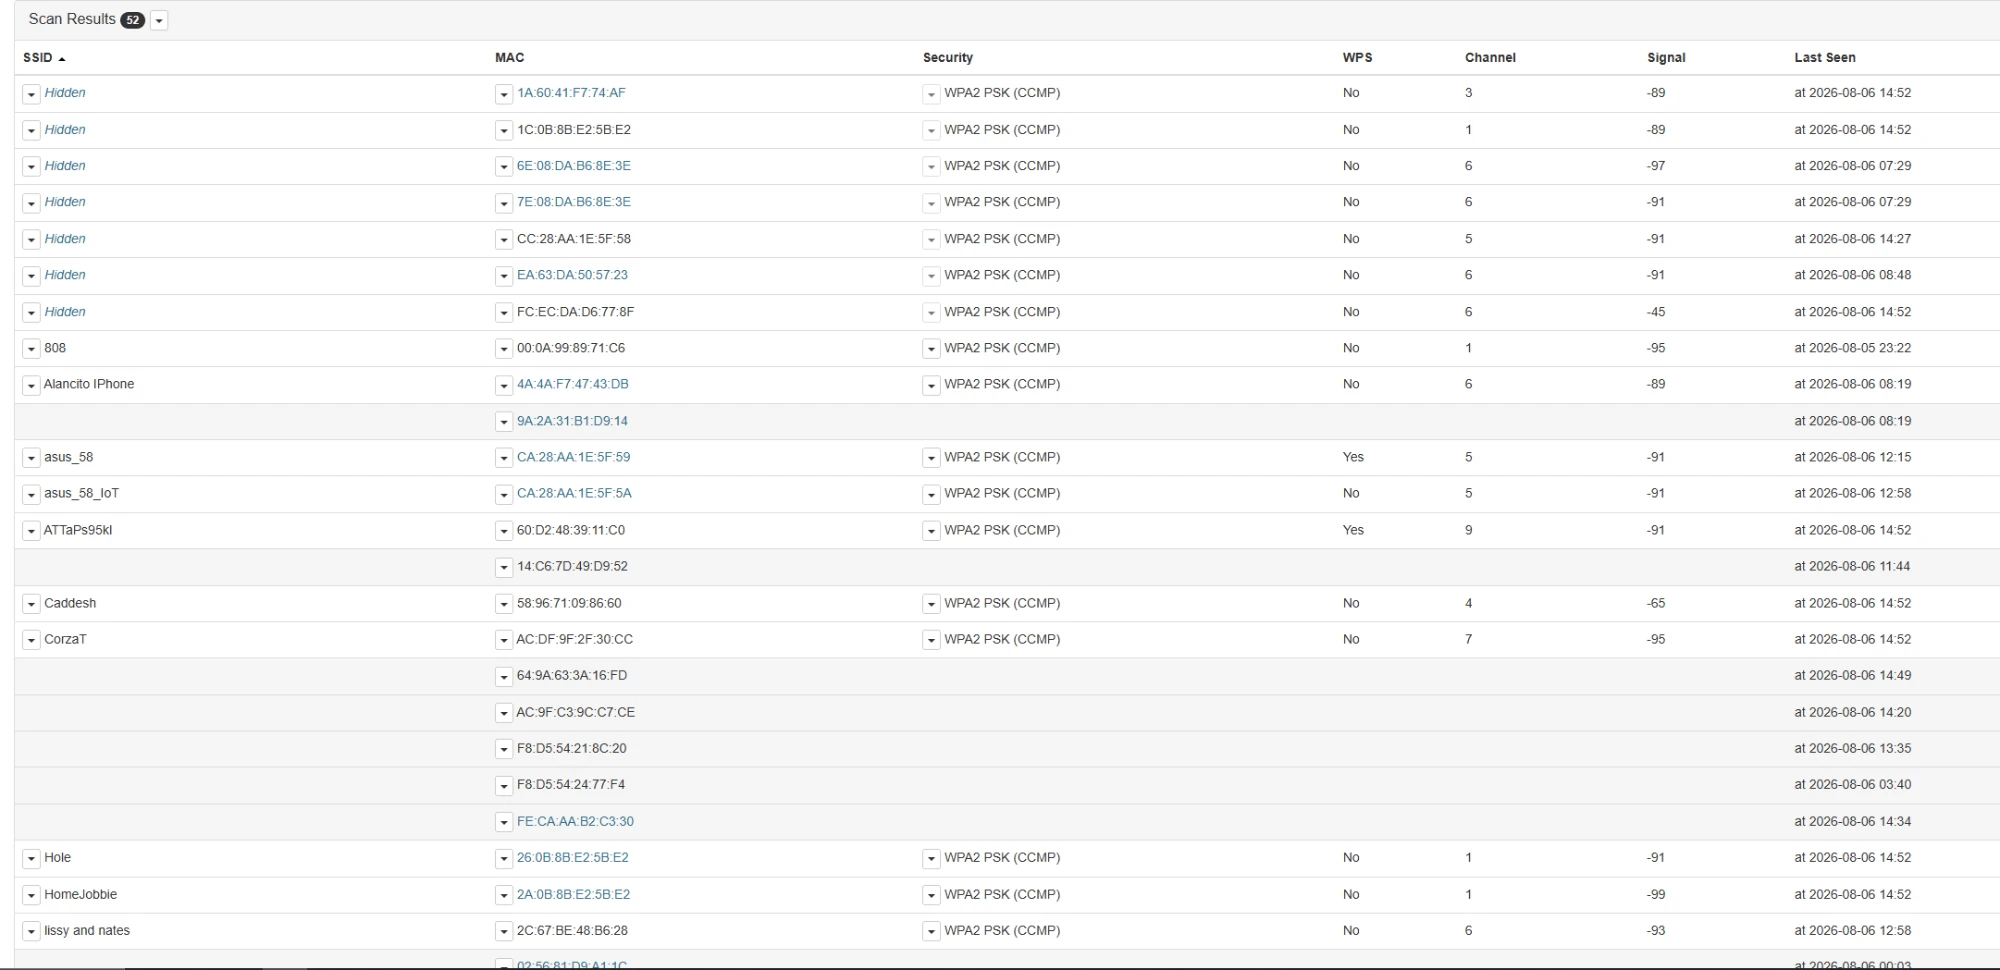 Recon results, 52 networks in one dual-band sweep, both bands active via the 5 GHz Panda. SSID, MAC, security, WPS, channel, and signal per entry.
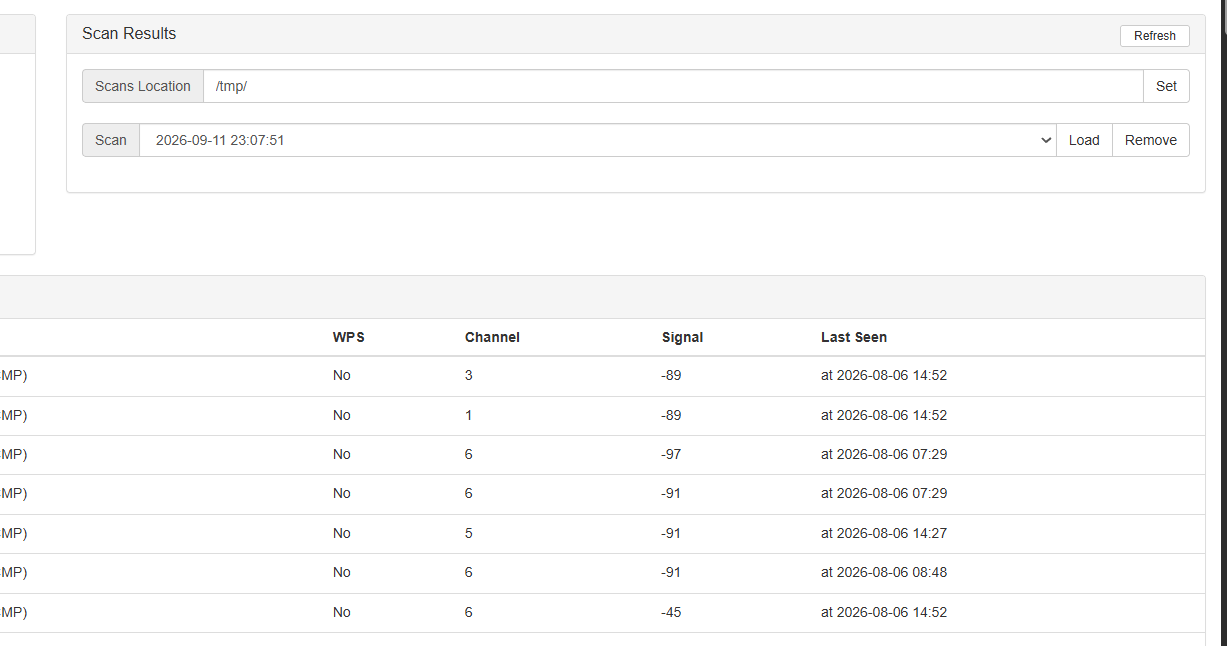 The scan panel: results are saved per run, so you can reload an earlier sweep and compare what changed.
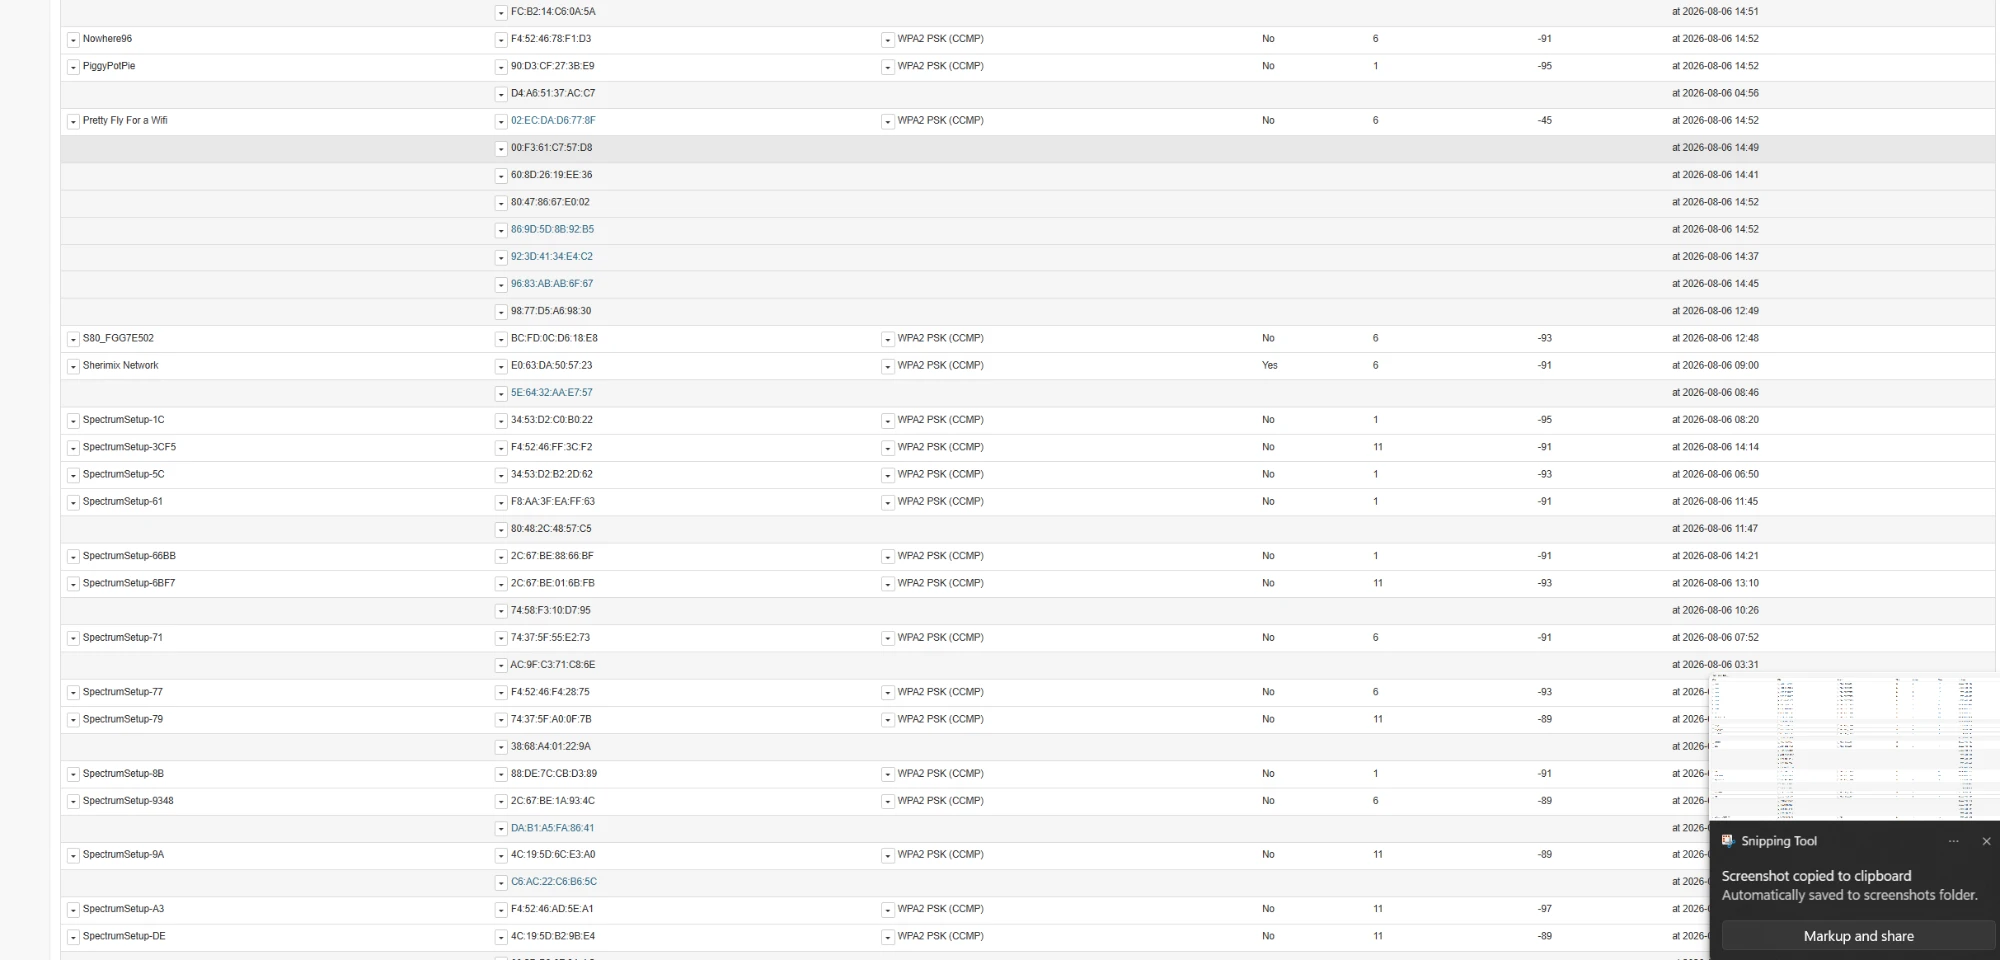 Reading the sweep: one physical router shows up as several near-identical BSSIDs (multi-SSID), and the lone WEP/WPS outliers stand out immediately.
What else it can do
Beyond passive recon, the platform also does rogue-AP / evil-twin hosting, captive portals, client tracking, probe-pool harvesting, community modules (DWall, Evil Portal), WPA-Enterprise attacks, and deauthentication + handshake capture.
10. Validating the full chain (on my own network)
To confirm the build actually worked end to end, not just that it powered on, I ran the complete WPA capture-and-recovery workflow against my own access point and my own phone. Described at a methodology level (deliberately not a step-by-step, for reasons in the next section), the chain is four stages:
| Stage | What happens | What it proves |
|---|---|---|
| 1. Recon | Identify the target AP’s BSSID, channel, and an associated client. | Radios + monitor mode are working on the right band. |
| 2. Force a re-auth | Nudge a client to reconnect so the join handshake occurs. | Injection works; the adapter can transmit management frames. |
| 3. Capture | Record the 4-way handshake at the moment the client reconnects. | The capture pipeline and storage (/sd) are functioning. |
| 4. Offline check | Validate the captured handshake against a known key, off-device. | The capture was complete and not corrupt, the chain is sound. |
The real-world snag: one radio, two jobs. Stages 2 and 3 both want the radio parked on the target’s channel, but a single adapter can’t hold a channel for capture and hop around transmitting at the same time, and background scan processes kept dragging it to the wrong channel. The fix was to stop the competing processes, lock the interface to the AP’s channel, and let capture and re-auth share the one radio. This is precisely why a second dedicated adapter (the 5 GHz card) matters, with two radios, one holds the channel while the other works.
The whole run took minutes and validated the entire build. The outcome that’s worth publishing, though, isn’t ‘it worked’, it’s what ‘it worked’ revealed about my own network’s posture, which is the next section.
11. Legal, ethical, and the lesson worth publishing
Read this before you replicate anything. Everything this device does is for your own networks, or networks you have explicit written authorization to test. Deauthing devices or intercepting traffic that isn’t yours can violate FCC rules, the federal CFAA, and state law (in California, Penal Code 502 and the two-party-consent wiretap statutes). The hardware does not care whose network it’s pointed at. You have to. Scope everything to gear you own or are authorized to touch, and use the Pineapple’s own Filters (Allow-mode, your devices only) as a hard leash. This is also why the section above stays at a methodology level rather than a copy-paste recipe.
The defensive takeaway (do this to your own network)
My home network was WPA2 with PMF disabled, the most attackable configuration there is, which is exactly why the chain above went so fast. Three fixes turn ‘falls in seconds’ into ‘not worth anyone’s time’:
- A long, random passphrase. Length beats complexity: a random 5-word passphrase blows past feasible offline cracking. A dictionary-friendly word-plus-numbers password does not.
- WPA3 (or WPA2/WPA3 mixed). Its handshake resists the offline dictionary attack that WPA2 is vulnerable to.
- Protected Management Frames (PMF / 802.11w) on. This makes spoofed deauth frames get ignored, so Stage 2 fails and an attacker can’t even force the handshake to capture in the first place.
That’s the real point of building this: not to break things, but to see exactly how my own network looks to someone who might, and then close the gaps. I went straight from the capture into my controller and had a concrete before/after: the exact settings that took me from ‘trivially exposed’ to ‘hardened.’ Breaking it is common. Being the person who then fixes it is the actual job.
12. Would I do it again?
Yes. About $60 versus $99+, and more importantly I understand every layer of this thing because I fought every layer of it. The Hak5 unit is more polished and more turnkey, if you want a tool that just works out of the box, buy theirs. If you want to learn wireless from the silicon up, build the Shadowapple and let it kick your teeth in for a night.
The wall checklist (a.k.a. what I’d tell past-me)
| # | Wall | The fix |
|---|---|---|
| 1 | Spec sheet looked perfect | Only Atheros (ath9k) or MediaTek (mt76). Check the chipset, not the box. |
| 2 | The ideal board (Slate) is EOL | Don’t chase dead listings. Shadow is buyable and cloner-ready. |
| 3 | Cheap dual-band = Realtek | 5 GHz must be MT7612U or RT5572. Realtek won’t work on the cloner. |
| 4 | Two images, opposite versions | OpenWrt = latest; cloner image = 19.07.7. AR300M16 isn’t in the v19 tree. |
| 5 | No SD slot | Use a USB flash drive + a hub (single USB port). |
| 6 | ‘Not enough space’ | Mount USB storage first; packages install to /sd. |
| 7 | Can’t see my own devices | They’re on 5 GHz; a 2.4-only adapter is blind to them. |
Credits: xchwarze for the wifi-pineapple-cloner firmware, and SHUR1K-N (McShuriken) for the Shadowapple resources and walkthrough that made the board-specific bits sane. Standing on the shoulders of people who did the hard part first.
Build it on your own gear. Point it at your own gear. Then go make your own gear harder to point it at.